Are you a prospective photographer? Then it is very likely that your pets will become a source of inspiration and will have to serve as a model for numerous photographic experiments. However, since animals are known to be unpredictable and unlike human models do not follow instructions, it is often easier said than done to take good snapshots of them. So we talked to professional animal photographer Jasper Stenger to get tips on how to avoid the typical dog or cat pictures and take really good photos that you like.
1. Have patience
When photographing cats or dogs, it’s important to be patient, as animals, like children, can only concentrate for a short period of time and are easily distracted. “I’ve often seen people get impatient when they photograph their pets,” says Stenger. “But calling commands to the animal or trying to direct it into a certain position only leads to stress on the animal and ruins any chance of good photos. He emphasizes how important it is to familiarize the cat or dog in advance with the camera and the environment in which you want to take the photos. ”Just give the animal time to walk around and get used to the surroundings and the camera before you start taking pictures,” he says. “If you’re working with flash, take a few test flashes to get the animals used to it beforehand.
2. Make sure that the animal is comfortable
Whether you’re jumping your dog through a hoop, or want to put your cat in a cute suit with a tie, remember that your photos won’t look very good if the animal doesn’t feel comfortable. ”I hate to use props and make sure the environment is as natural as possible to make the dog look happy and relaxed,” says Stenger. “When you try to force something, the animal feels stressed and looks like that in the photo. If you want to use props, try them out and try them out, but if the animal feels uncomfortable with them, think about something else.” One trick to help animals relax is to photograph them outdoors, which is generally a more natural environment for the animals. Another trick is to walk the dog a little beforehand so that he is not too nervous and still has enough energy.
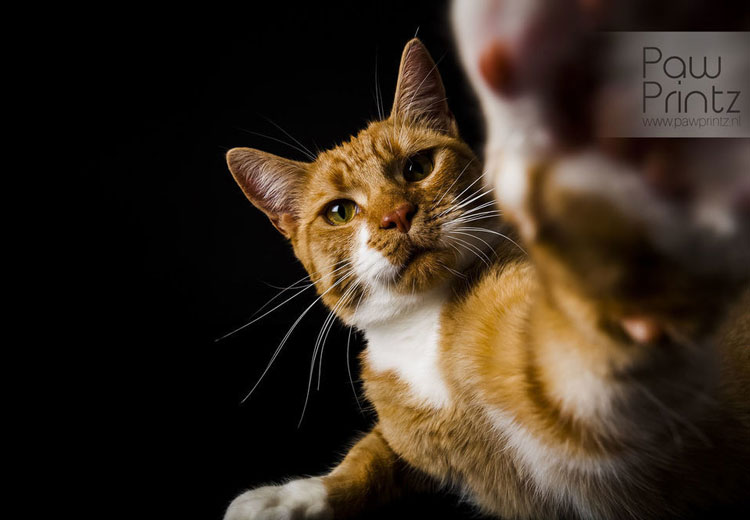
3. Draw the attention of the animal to yourself
A few shots of your cat or dog looking into the distance can be nice, but if you have your pet’s full attention, the shots will be even more impressive. ”Most of the time, my assistant will use treats or toys to make sure the animal moves into the right position,” explains Stenger. He also points out that if, for example, the owner of the animal or another known person is standing behind you while you are photographing, this can help attract the dog’s attention so that he looks straight into the camera. “The best thing is to be flexible and try out what works best for the different animals,” he adds. “What always works well with dogs that are afraid of the camera is to offer them a treat whenever they come close to the camera. This way they understand that the camera is not a danger.”

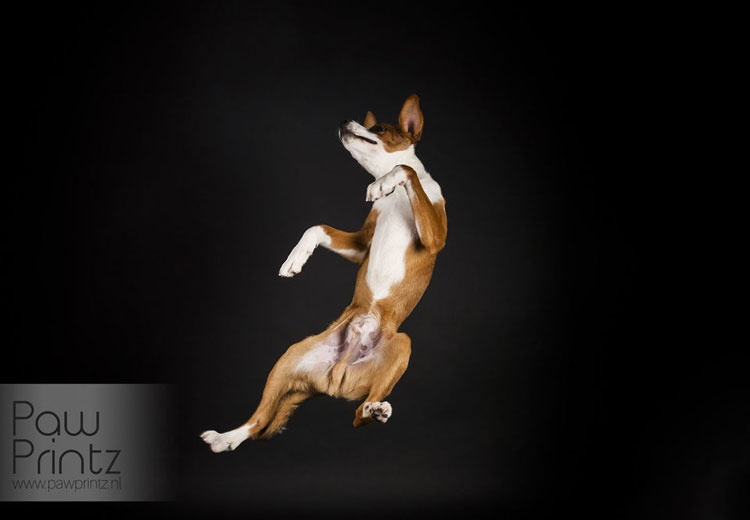
4. Lighting is everything
As with any other type of photography, lighting is extremely important in animal photography. The easiest and cheapest way is to start with natural lighting. Stenger points out that the time of day makes a big difference in outdoor photography. “When you take your pet outside at noon, when the sun is at its highest, the light is very harsh and casts unsightly shadows,” he says. Instead, he suggests going outside early in the morning or late in the afternoon when the light is softer. But if you have to take pictures at lunchtime, you can try going to the woods or to a park where the light is filtered through many trees. However, if animals are to be photographed indoors, large windows or glass doors can be useful. Remember, however, that the contrast between light and shade can be very strong when you photograph near a window in bright sunlight. In this case, an inexpensive collapsible reflector can help throw some extra light onto the shaded area without making it look unnatural.
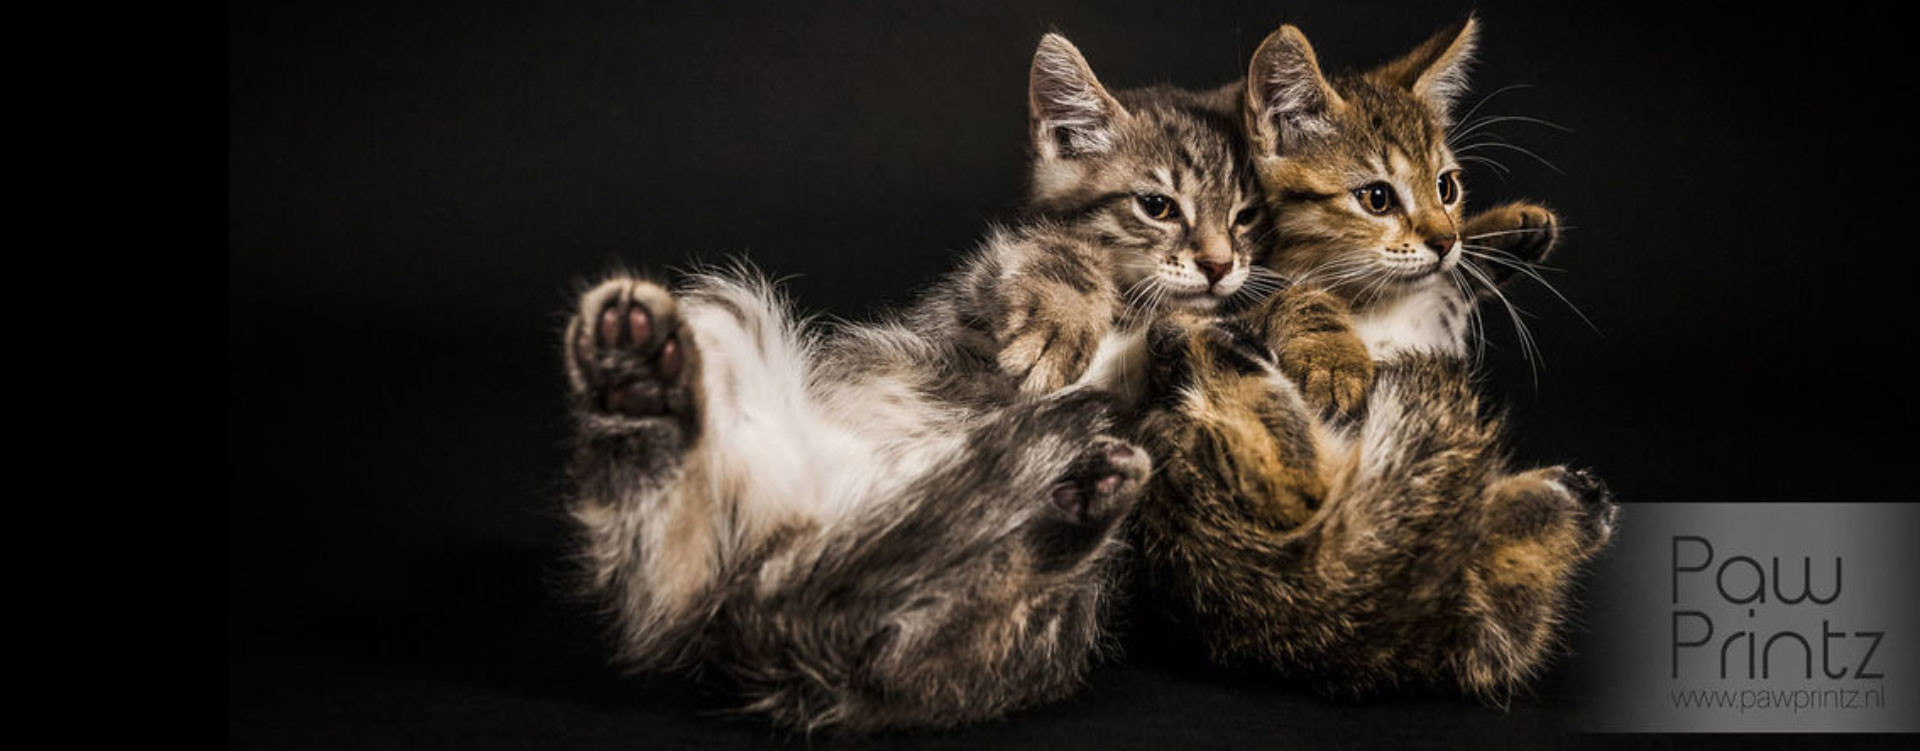
5. Pay attention to the background
Newcomers to photography often pay too little attention to their surroundings and concentrate only on what they want to photograph. But this can be a big mistake. ”It’s immensely important to pay attention to the background, especially if you’re inside,” says Stenger. “If you’re not shooting against a pure white or black studio background, make sure there’s nothing standing around in the background, such as shoes, or any other disorder that might affect the picture.
6. Select the correct camera settings
The camera settings you choose always depend on the situation and the type of photo you want to take. For example, if you want to take action shots or take pictures of animals that move a lot, a short shutter speed is important. If you can’t handle the manual mode, the aperture priority (TV or S) will help you try different shutter speeds without having to adjust the aperture each time. ”Some modern cameras also have the ISO auto function,” says Stenger. “With this function, you can take pictures with the auto iris, and if the iris becomes too small for the lens, the ISO sensitivity automatically increases. So you have one less problem to worry about.”
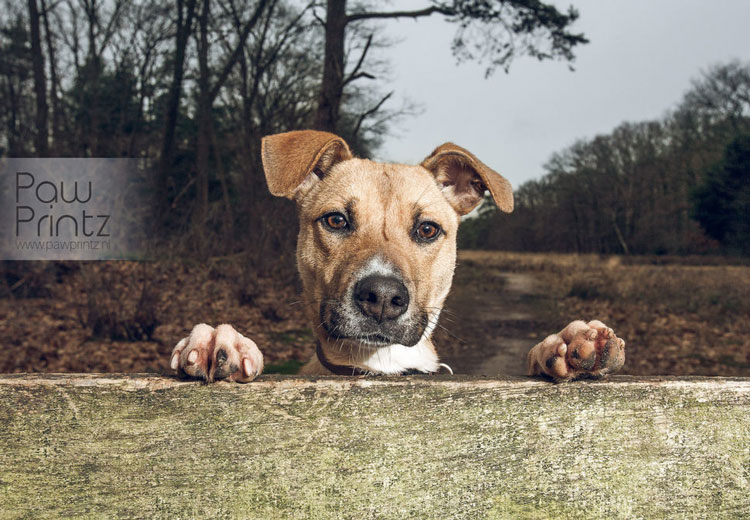
7. Go to a height with the animals
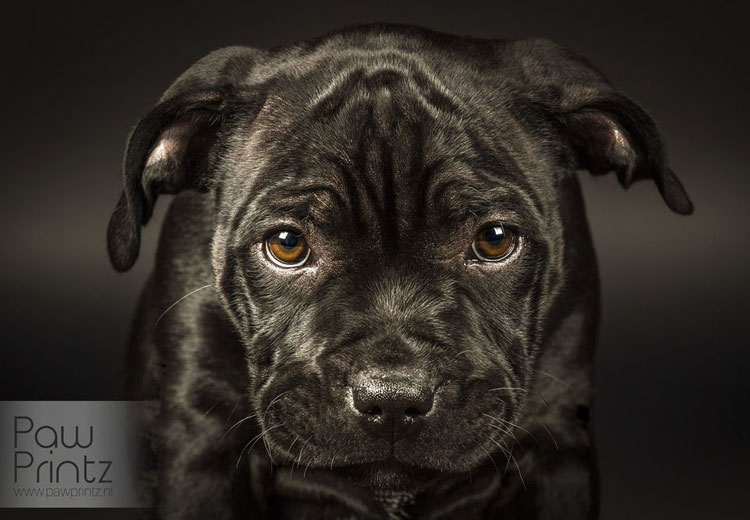
If you are not used to taking pictures of animals, you may be tempted to take pictures standing up and looking down at them. This is not fundamentally bad, but Stenger points out that you will get a different perspective if you go to a height with the animal. ”If you take photos of animals from a perspective that everyone else sees, it means your photos don’t stand out very much from the others,” he says. “If you bend down to the animal and get close to it, the photo becomes much more personal. Try to concentrate on the eyes as much as possible. The eyes are really the windows of the soul.”
8. Choose your equipment carefully
Although it’s possible to take great photos of your dog or cat with virtually any lens, some lenses are more suitable than others. Which lenses do professionals actually use? ”I alternate between a few lenses, but my favorite lens is an 8mm fish eye, which I use to get very close to the animals,” says Stenger. “You can really make very funny pictures with it. But it’s not suitable for taking pictures of animals that are afraid of the camera, because you have to get very close to their head (20 to 25 cm).” “Both Canon and Stenger are really funny. ”Both Canon and Nikon make an excellent 50mm lens with an aperture of f/1.8, which produces a beautiful blurred background at larger apertures and is relatively inexpensive. But the lenses (18-55 mm) that are often supplied with new cameras are also good for a start,” he says. He advises you to learn how to use your existing equipment before investing in new equipment. Once you’ve found out what you can’t do with your current lens, you know what new lens to look for instead of buying a new lens and then finding out what you can do with it.
9. Develop some post-processing skills.
”The post-processing is almost as important as the photography itself,” says Stenger. “For example, if a dog is a bit nervous or always runs away, I ask my assistant to stand next to the dog and keep him on a leash. Both the leash and my assistant can be retouched out later with Photoshop”. ”For this I stop with the camera after the admission and ask the assistant with the dog from the picture to go. Then I take another picture with the same settings. That makes it easier later to copy the background over the assistant or other unwanted objects.” Of course, it’s always better to do everything right the first time. That saves a lot of work later. “If a photo doesn’t need to be edited very well, I usually just adjust the contrast or sharpness in Lightroom,” he says. “But for the actual processing, for example to remove disturbing branches or the line from the picture, I use Photoshop.
The original version of this article was written by Bob Books, UK.