
What the professional photographer started a good two months ago is becoming increasingly popular: With his photography course for the iPhone, Alex Lörtscher from Uster seems to have hit the mark. What began a good 25 years ago with the first cell phone photos is today more and more a serious alternative to photography with Canon, Nikon, Sony & Co.
Photographing with the iPhone: How to take beautiful photos with your cell phone
In his photography course, the passionate photographer with a studio in Uster teaches the craft of a professional photographer – you don’t need an expensive camera, just an iPhone. Alex thus shows that cell phones like the iPhone are becoming an ever greater competitor for established camera brands. This is also shown by the development of sales in recent years in the corresponding market.
Taking pictures with the iPhone: Know the limits
In the beginning, there is criticism. Alex is viewed skeptically for his idea of offering photography support to iPhone owners. Critical feedback such as «Professionals take true-color photos in RAW format and with a printable quality. And since the light is often not enough, usually with additional flash units and appropriate accessories for light control», he hears more and more from his colleague environment.
One thing is clear: the iPhone (still) has certain limitations. But if you travel a lot and like to take photos in your private life, you can impress your loved ones with great iPhone photos. Printing photo albums directly from the smartphone is also possible thanks to the ever-improving quality. One of the advantages of taking photos with the iPhone is therefore obvious: the time saved.
So if you understand the photographic limitations of an iPhone, as well as how to use the most important apps, and can properly operate the associated camera app, you can also take print-quality photos with the iPhone. In addition to the correct settings of your iPhone camera, timeless key techniques and principles of image composition play a key role for beautiful photos, which professional photographers like Alex use regardless of the equipment.

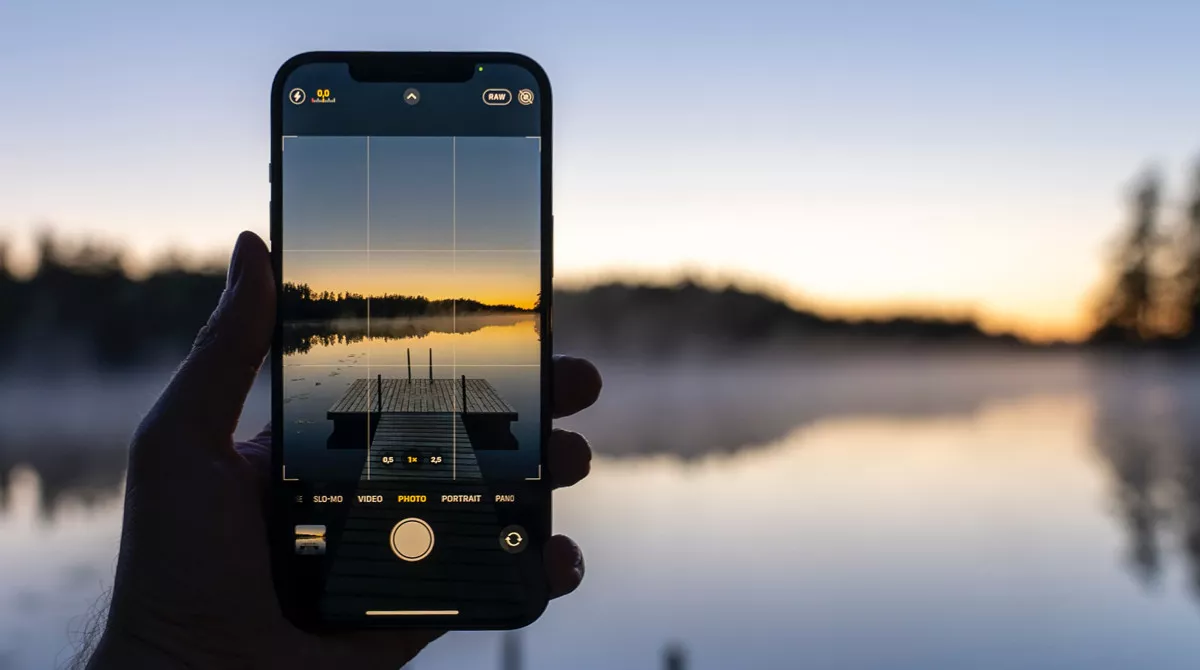
iPhone photo of fireworks: With the right camera settings and a tripod, the iPhone masters even difficult lighting situations effortlessly (Photo: Alex Lörtscher)
- Pro-tip #01: In low-light situations, your iPhone will automatically expose a bit longer. There is a risk that your photos will be blurry. If possible, take photos in RAW format and use a tripod for your shot so that you still succeed in taking high-quality photos.
RAW format on the iPhone: What is it?
Advanced (hobby) photographers usually create their photos in RAW format. But can you take photos with your iPhone in RAW format at all and what does «RAW» mean? The raw file is still unprocessed and looks rather colorless compared to a JPEG or HEIC photo. So a RAW photo is like a digital negative that has to be developed first.
So why would you prefer a colorless RAW file to a JPEG or HEIC file? The answer lies in the image processing: A RAW photo contains more image information. This means that an iPhone photo taken in this format offers you more possibilities in image processing. The result is a higher quality photo, especially in print.
How do I take photos in RAW format correctly with the iPhone?
Since iOS 14.3, the iPhone supports taking RAW photos without an additional app – but the feature is only available from the iPhone 12 Pro and iPhone 12 Pro Max. Unfortunately, older iPhone models do not yet have the option to take photos in RAW format as standard. But there is a trick: iPhone owners can also take photos in RAW format with the paid app Camera+.
iPhone photos in RAW format: With the paid app Camera+, photos in RAW format can be taken at the touch of a button
Camera+ is considered the most powerful alternative to your iPhone camera app and is easy to use, but still offers features that a professional photographer would love to use. To activate the RAW function, just click on the mode icon at the top of the screen. Et voilà: Your iPhone creates the photo in the much larger RAW format. By the way, there are a lot of great filters in this app, so it’s doubly worth it.
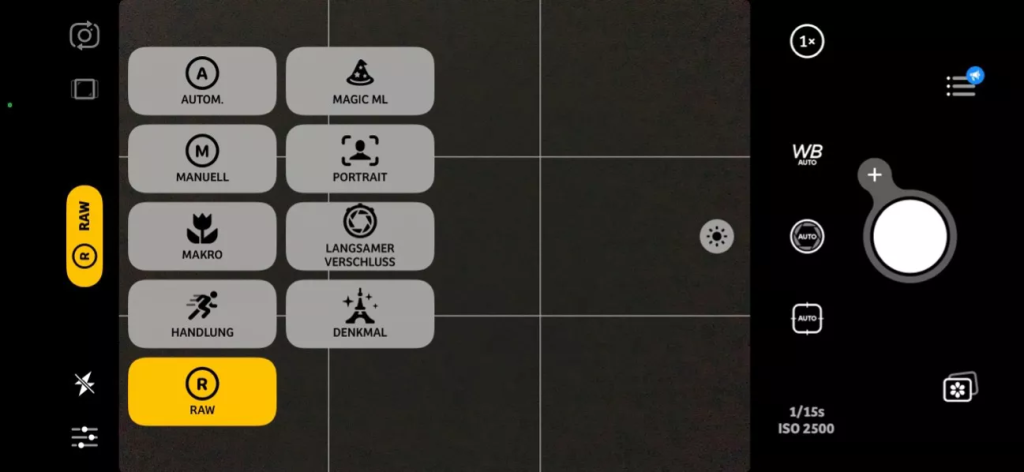
If you own an iPhone 12 Pro or iPhone 12 Pro Max, the RAW format is already integrated in the camera app. The RAW icon is located in the top bar of the Camera app next to the Live Mode icon. You can simply tap the RAW mode with your finger to turn it on or off. RAW mode is available to you in all modes except portrait mode. Important to know: Live mode is no longer usable when you shoot in RAW.
Another important tip: To see the RAW option in your camera app, check the settings of your iPhone and activate the corresponding option. Apple, by the way, calls its RAW format «Apple ProRAW» and, as mentioned above, promises additional creative possibilities if you want to make adjustments to the exposure, colors and especially the white balance, for example.
iPhone photography: When do photos in RAW format make the most sense?
When you take photos in RAW format on your iPhone, every RAW photo needs to be edited. Pictures in RAW format don’t look nice unedited. However, the added value of taking photos in RAW format is often minimal. In everyday life, it is therefore advisable to shoot in the practical JPEG or HEIC format. Most photographers only use RAW specifically for photos where it really pays off.

iPhone photo in printable quality: RAW mode is particularly suitable for high-contrast photos (with light and dark tones), but also for photos in poor lighting conditions (Photo: Alex Lörtscher)
A short summary: Photographing in RAW format is worthwhile in poor lighting conditions, especially for landscape photos. For example, if you are photographing clouds or snow, the RAW photo will show tone and texture in your photo better than JPG or HEIC photos. In addition to the greater time required for image processing, the size of the image file and the storage space it requires on your iPhone is a disadvantage of RAW photography.
- Pro-tip #02: It’s worth thinking about before your next photo shoot: Do you want to just snap wildly and take snapshots with no sentimental value? Or do you want to create lasting memories of your family, your children or your travels with your photos and possibly even immortalize them in a photo album or a mural? For the latter, it’s worth taking photos in RAW mode.
Optimize iPhone photos with the right app
In his iPhone photography course, Alex goes into detail about the various advantages of iPhone photography compared to taking photos with classic SLR or, more recently, mirrorless system cameras. Especially the class of compact cameras will probably disappear completely from the market in the next few years due to the progress of cell phone photography. This is reported by Armin Pfister, branch manager of the photo specialty store Tevy AG in Rüti.
Apple’s diverse range of apps for taking photos with the iPhone is also an optimal supplement to ensure that beautiful photos succeed. It’s not easy to keep track of which app is suitable for taking photos or for image editing… 😉
Generally speaking, there is always the question of whether a successful photo needs any additional image editing at all.
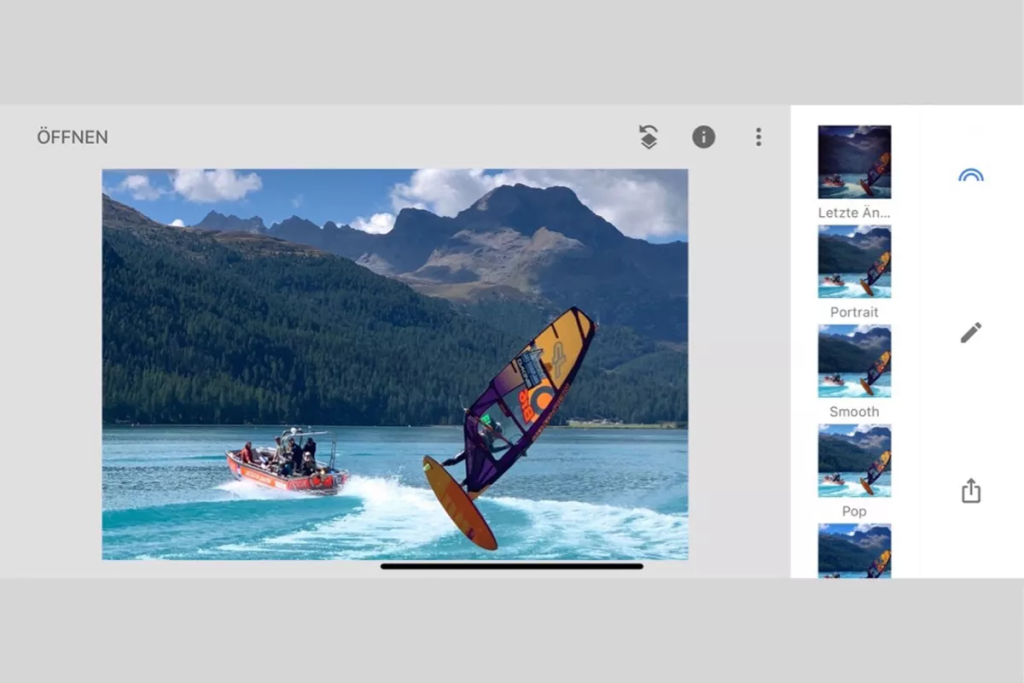
Image editing with the right app: Perfect your iPhone photo directly on your phone with the right app – one of the many advantages compared to a compact camera
- Pro-tip #03: For perfecting your iPhone photos you should use the right app. The pro emphasizes the expression and message of the successful photo with appropriate and not exaggerated image editing. For this, Alex uses the app Snapseed, originally developed by Google. It is considered one of the best apps on the market, is easy to use and available for free.
Conclusion: How to take professional photos with the iPhone?
Cell phone photography has developed massively in recent years. With the right setting of your iPhone camera app and some important key techniques of the professional photographer, you will succeed in taking beautiful photos with your iPhone even in challenging light situations.
Especially for more ambitious iPhone photographers who want to edit their work afterwards and print it in a photo album or a wall enlargement, RAW photography is a good choice.
Thanks to Apple’s continuous development, the difference between a smartphone and classic cameras, primarily compact cameras, is also getting smaller. Apps like Camera+ or Snapseed are excellent tools for the more ambitious iPhone photographer. They help you perfect your iPhone photos.
If you are interested in iPhone photography and looking for inspiration and support, you will get it in the unique iPhone photography course by professional photographer Alex Lörtscher. Learn how to take photos like a pro with your iPhone in 30 short lessons. After this photo course you will take much more beautiful photos with your iPhone, you don’t need an expensive professional camera.
Hopefully these tips from Alex will help you to take more beautiful photos with your iPhone. If you want to give him feedback on his tips or his iPhone photography course, feel free to comment below this post!
To the iPhone photography course

More information about Alex Lörtscher:
https://www.alexloertscherfoto.ch